
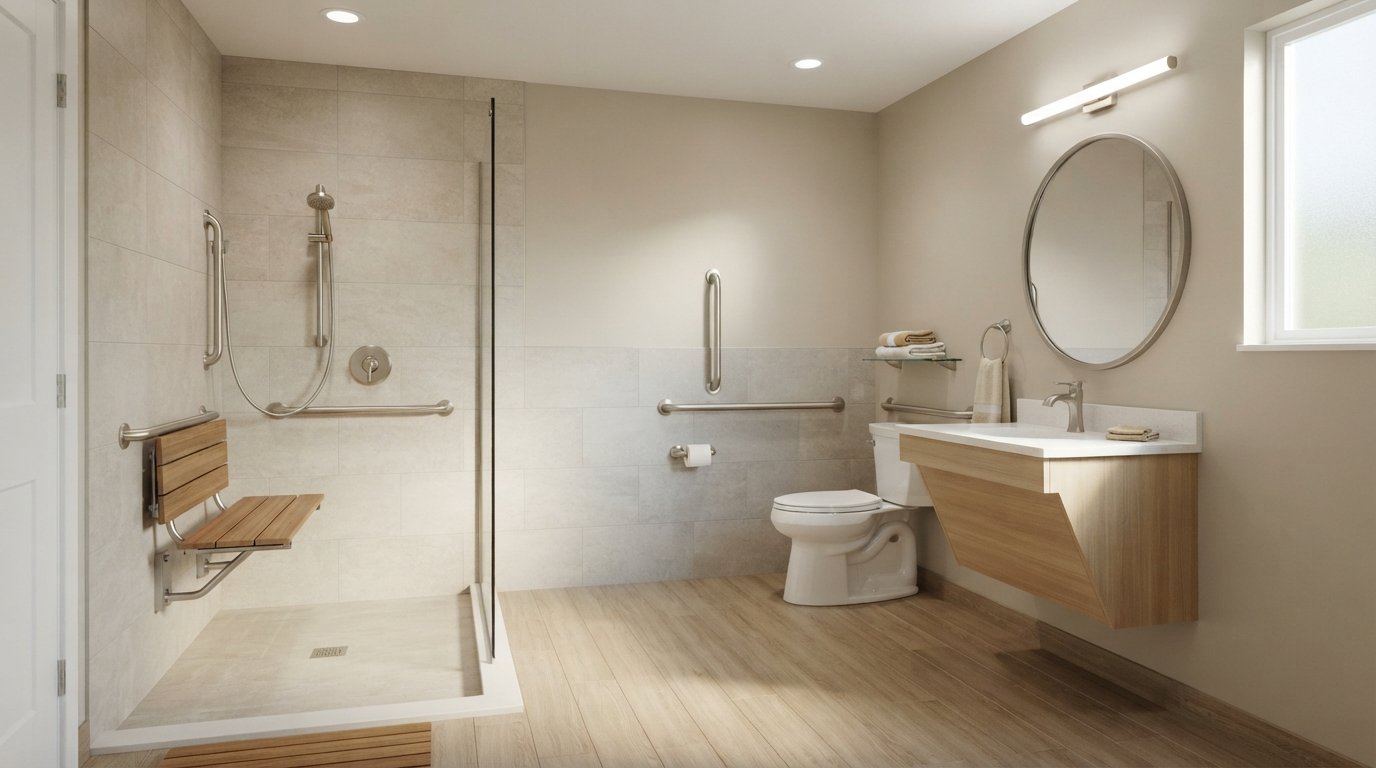
Accessible Bathroom Design Features Worth Adding Now
Accessible bathroom design features worth adding now can prevent falls and add home value. Learn which upgrades to prioritize for safety and style.

By Cameron Howard
Learn more about Home Modification for Accessibility for guides, costs, and what to expect.
Compare Home Modification for Accessibility Pros Near You

Enter your ZIP code to compare top-rated local professionals and request free quotes.
A bathroom that works for everyone in the household is no longer a niche upgrade. It is a practical investment that supports aging parents, family members with mobility challenges, and anyone recovering from surgery or injury. The best part is that accessible bathroom design features worth adding now do not have to look clinical or cost a fortune. With smart planning, you can create a space that is safer, easier to use, and still stylish.
Whether you are remodeling a hall bath, updating a master suite, or planning ahead for future needs, the decisions you make during design and construction matter far more than quick add-ons later. This guide walks through the most impactful features, how they affect your budget, and how to work with a contractor to get them installed correctly the first time.
Why Accessible Bathroom Design Matters More Than Ever
According to the Centers for Disease Control and Prevention, millions of adults live with some form of mobility limitation, and the bathroom is one of the most common places for slips and falls. Standard bathroom layouts often include narrow doorways, high tub walls, and slippery floors that become serious hazards as we age or recover from injury. Accessible design removes those barriers without sacrificing visual appeal.
Beyond safety, an accessible bathroom adds long-term value to your home. Buyers increasingly look for features like curbless showers, comfort-height toilets, and reinforced walls for grab bars. These elements signal that a home is well-maintained and ready for multigenerational living. If you plan to age in place, they can delay or eliminate the need for a costly move later.
From a budgeting standpoint, many accessible features cost little more than standard options when included during a remodel. A curbless shower, for example, may add a few hundred dollars to the tile and waterproofing scope, but retrofitting one later could cost several thousand dollars because it requires demolishing the existing floor and redoing plumbing. Planning ahead is almost always cheaper.
If you are comparing contractors and want transparent pricing on accessibility upgrades, working with a platform that specializes in connecting homeowners to local pros can simplify the process. Resources like BuySellRemodel help homeowners plan affordable projects and find experienced contractors who understand accessibility requirements, from free estimates through final inspection.
Core Accessible Bathroom Design Features Worth Adding Now
Not every feature requires a full gut renovation. Some can be integrated into a minor remodel or even a weekend project. The following list covers the highest-impact changes, ranked by how much they improve safety and usability.
- Curbless or low-threshold shower: Eliminates the step-over hazard and allows wheelchair or walker access. Linear drains and proper slope are essential.
- Comfort-height toilet: Sits 17 to 19 inches from floor to seat, reducing strain on knees and hips. Many models also offer bidet functionality.
- Reinforced walls for grab bars: Installing blocking behind drywall during construction costs very little and lets you add grab bars anywhere later.
- Non-slip flooring: Textured tile, vinyl, or treated concrete with a coefficient of friction of 0.6 or higher reduces slip risk even when wet.
- Lever-style faucets and door handles: Easier to operate for people with arthritis or limited grip strength. Also safer for children.
These five features form the foundation of an accessible bathroom. If your budget allows only a few upgrades, prioritize the curbless shower and reinforced walls, since they are the most difficult and expensive to add later. The toilet and flooring can often be swapped without major demolition, and lever handles are a quick DIY change.
Keep in mind that accessibility is not just about wheelchairs. A person using a walker, a parent holding a toddler, or someone with a temporary injury all benefit from the same design choices. Universal design principles aim to make spaces usable by as many people as possible, regardless of age or ability.
Layout and Space Planning for Accessibility
Even the best fixtures will not help if the layout blocks movement. The Americans with Disabilities Act (ADA) provides guidelines that are useful for residential projects, even though private homes are not legally required to comply. A common recommendation is a 60-inch turning radius in the center of the bathroom, which allows a wheelchair to rotate fully. If your bathroom is smaller, a T-shaped turning space can work in a pinch.
Doorways should be at least 32 inches wide, and 36 inches is better. Pocket doors or outward-swinging doors save space and are easier to operate from a seated position. If you cannot widen a doorway, consider offset hinges that add about two inches of clearance without moving the frame.
Shower size matters as well. A 36 by 36 inch shower is the minimum for comfortable seated use, but 60 by 30 inches or larger is ideal if space permits. Include a fold-down bench or a built-in seat, and place controls within reach of the seated position (usually 38 to 48 inches from the floor). A handheld showerhead on a slide bar adds flexibility for caregivers and users alike.
Storage should also be accessible. Avoid deep cabinets that require reaching or bending. Drawer stacks, open shelving at mid-height, and pull-out organizers keep daily items within easy reach. If you are planning a larger renovation, consider a split vanity with knee space underneath so a user can roll up to the sink.
Lighting, Electrical, and Safety Upgrades
Good lighting prevents accidents and makes the bathroom easier to use for everyone. Layered lighting works best: ambient light from ceiling fixtures, task lighting near the mirror, and night lights for late trips. Motion-sensor lights are especially helpful because they eliminate fumbling for switches in the dark.
Electrical outlets should be placed at accessible heights, typically 24 to 48 inches above the floor, rather than the standard 12 to 18 inches. GFCI protection is required by code in bathrooms and should never be skipped. If you are adding a heated floor or towel warmer, plan the circuit early with your electrician to avoid overloading existing wiring.
Ventilation is another accessibility issue that often gets overlooked. Proper exhaust fans reduce humidity, which lowers the risk of mold and makes the floor less slippery. Choose a fan with a humidity sensor or timer so it runs long enough after showers without relying on someone to remember to turn it off.
For added safety, consider a wall-mounted heater or heat lamp in the shower area. Temperature control helps prevent dizziness from sudden cold, which can lead to falls. Thermostatic shower valves are a worthwhile upgrade because they keep water temperature consistent even when someone else uses a sink or appliance.
Choosing Materials That Support Accessibility
Material selection affects both safety and maintenance. Flooring should be slip-resistant even when wet. Porcelain tile with a matte or textured finish is a popular choice, as are luxury vinyl planks with a textured surface. Avoid polished stone or glossy ceramic in wet areas.
Wall materials should be easy to clean and resistant to moisture. Large-format tiles reduce grout lines, which means less scrubbing and fewer places for mold to grow. If you want a seamless look, consider solid surface panels or waterproof wall systems that install directly over cement board.
Countertops should have rounded edges to prevent injury, and open space underneath the sink allows a wheelchair user to pull close. Wall-mounted sinks are an option, but they require blocking in the wall for support. A furniture-style vanity with a removable cabinet door can offer the best of both worlds: storage now, knee space later.
When selecting fixtures, look for lever handles, push-button controls, and anti-scald valves. These small details make a big difference in daily usability. Also consider the height of the mirror and medicine cabinet. A mirror that tilts or extends outward helps users of different heights see comfortably.
Budgeting for Accessible Bathroom Upgrades
Costs vary widely depending on the scope of your project and your region. A minor refresh that adds grab bars, a comfort-height toilet, and non-slip flooring might cost $2,000 to $5,000. A full accessible remodel with a curbless shower, widened doorway, and new layout can run $15,000 to $30,000 or more.
To keep costs manageable, prioritize features that are difficult to retrofit later. Structural changes like widening doorways, reinforcing walls, and creating a curbless shower should be done during the main construction phase. Finishes and fixtures can be upgraded over time as budget allows.
Many contractors offer free estimates and can help you phase the work. If you are working with a limited budget, ask about splitting the project into two phases: phase one for safety-critical items, phase two for cosmetic upgrades. This approach lets you move forward without compromising on the features that matter most.
It is also worth checking whether any local, state, or federal programs offer grants or tax credits for accessibility modifications. Some states provide low-interest loans or rebates for aging-in-place improvements. A knowledgeable contractor can sometimes point you toward these resources, though you should verify eligibility on your own.
Working With a Contractor on Accessibility Features
Not all contractors have experience with accessible design. When interviewing candidates, ask specific questions about their approach to curbless showers, grab bar blocking, and ADA guidelines. A contractor who understands these details will save you time and prevent costly mistakes.
Request a written scope of work that includes exact dimensions, product specifications, and installation methods. For example, the shower slope should be specified (typically 1/4 inch per foot), and the type of waterproofing membrane should be named. Vague contracts lead to disputes and change orders.
Check references from past clients who requested similar accessibility upgrades. If possible, visit a completed project to see the craftsmanship firsthand. A reputable contractor will be proud to show their work and answer your questions.
Finally, confirm licensing, insurance, and warranty terms before signing anything. Accessibility features often involve plumbing and electrical work, so the contractor must be properly licensed or use licensed subcontractors. A written warranty on labor and materials protects you if something fails later.
Small Changes With Big Impact
If a full remodel is not in the cards right now, there are still meaningful steps you can take. Installing a handheld showerhead, adding a grab bar near the toilet, and placing non-slip mats in wet areas are inexpensive and effective. These changes can be done in an afternoon and cost under $200.
You can also improve accessibility by decluttering. Remove unnecessary items from the floor, keep frequently used products within reach, and ensure the path to the toilet and shower is clear. Good organization is free and makes a real difference.
For a slightly larger investment, consider replacing a standard toilet with a comfort-height model or adding a bidet seat. These upgrades improve comfort and hygiene, and they are relatively easy to install. If you are handy, you can do them yourself; otherwise, a handyman or plumber can handle it quickly.
Remember that accessibility is a spectrum. You do not have to do everything at once. Start with the changes that address your most immediate needs, and build from there as budget and time allow.
Accessible bathroom design features worth adding now range from simple swaps to full-scale renovations. The key is to plan ahead, prioritize safety, and choose materials and layouts that work for everyone in your home. By making thoughtful choices during your remodel, you create a space that is not only beautiful but also resilient and welcoming for years to come.