
DIY Home Renovation Projects That Actually Save Money
DIY home renovation projects that actually save money start with smart planning. Call (833)-439-3727 to compare local contractor quotes and protect your budget.

Learn more about Home Remodeling for guides, costs, and what to expect.
Compare Home Remodeling Pros Near You

Enter your ZIP code to compare top-rated local professionals and request free quotes.
Every homeowner considering a renovation faces the same question: can I do this myself and keep more money in my pocket? The answer is not always yes. Some projects deliver massive savings because labor represents the biggest chunk of the bill, while others turn into money pits the moment a DIYer picks up a tool. Understanding which projects fall into each category is the key to protecting your budget and your home.
This guide breaks down the DIY home renovation projects that actually save money, based on real labor-to-material cost ratios, required skill levels, and the hidden risks that can wipe out your savings. You will learn where to swing the hammer yourself, where to put the hammer down, and how to recognize the moment a project crosses from smart savings into costly mistake territory.
Why Some DIY Projects Save Money and Others Do Not
The math behind DIY savings is simple on the surface: if a contractor charges $3,000 for a job and materials cost $1,000, doing it yourself saves $2,000. But that equation only works when the work is done correctly the first time. When a DIY mistake requires a professional to fix it, you pay for materials twice, labor on top, and sometimes water damage or structural repairs that dwarf the original project cost.
Projects with high labor-to-material ratios are the sweet spot for DIY. Painting, for example, typically carries labor costs of 70 to 80 percent of the total bill. The materials are inexpensive and forgiving, and the skills required are minimal. By contrast, electrical work and plumbing carry lower material costs but extreme risk: a mistake can cause a fire, flooding, or code violations that cost thousands to correct.
Before starting any project, estimate the labor share of a professional quote. If labor is more than half the total, DIY likely makes sense for a confident homeowner. If materials dominate the cost or the work involves regulated systems, hiring a pro is usually the better financial decision.
High-Value DIY Projects That Deliver Real Savings
These projects consistently deliver strong returns because the work is repetitive, the materials are affordable, and mistakes are usually cosmetic rather than catastrophic. Each one below includes the skills and tools required so you can honestly assess whether it fits your abilities.
Interior Painting
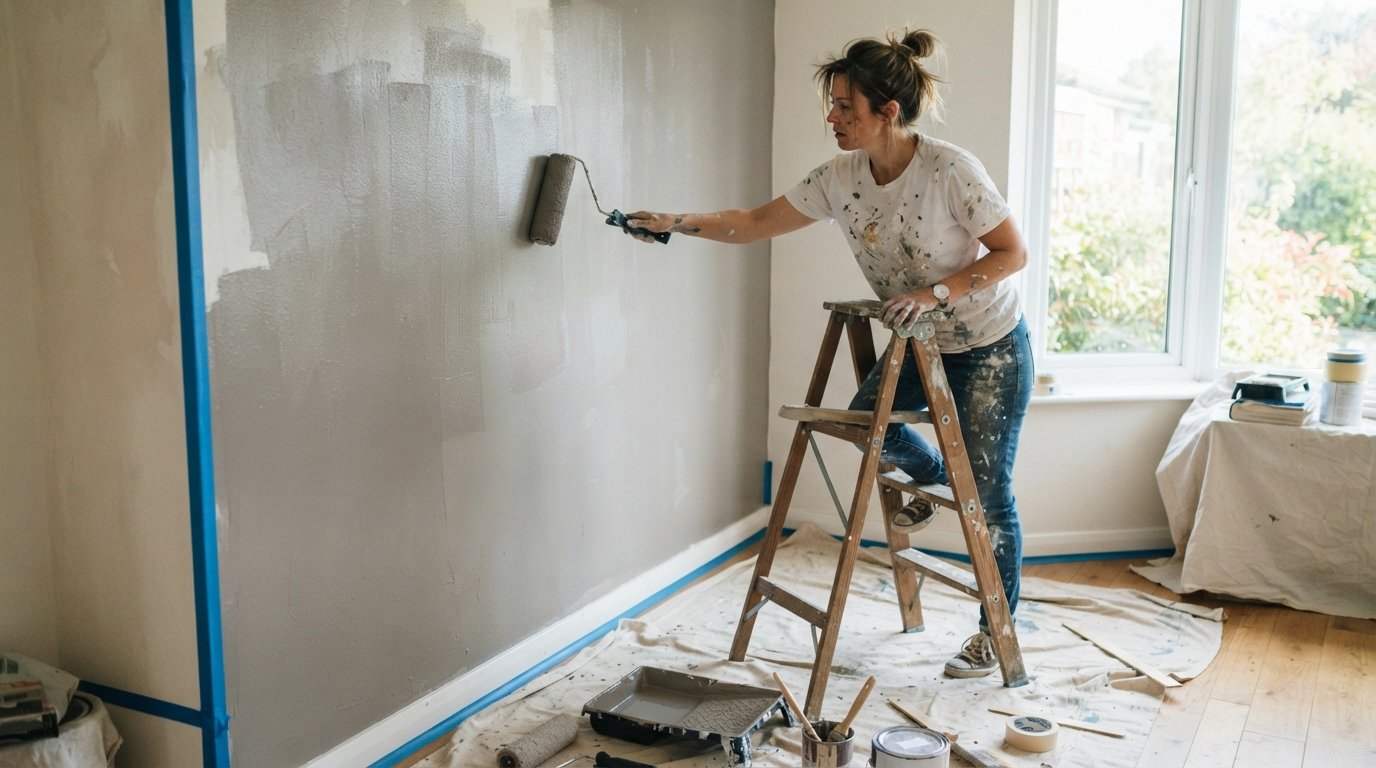
Painting is the classic DIY winner. A professional interior painting job for a 1,500-square-foot home can run $3,000 to $5,000, while the paint, primer, tape, and rollers for the same job cost $400 to $800. The savings can exceed $3,000 on a single project, and the skills required (cutting in edges, maintaining a wet edge, proper prep) are learnable in a weekend.
You will need drop cloths, painter's tape, angled brushes, rollers, a roller extension pole, sandpaper, and patching compound. The biggest risks are paint drips on floors and poor prep work that causes peeling later. Both are preventable with patience and careful masking. If your walls have significant damage, water stains, or lead paint (common in homes built before 1978), bring in a professional, because proper remediation is a safety issue, not a cosmetic one.
Interior Door and Trim Replacement
Replacing interior doors and trim is another strong DIY candidate. A contractor might charge $300 to $500 per door installed, while a pre-hung door costs $100 to $250. Trim work carries similar ratios: labor often doubles the material cost. The skills required include measuring accurately, using a level, and operating a miter saw or coping saw for clean corners.
Tools needed include a tape measure, level, drill, saw, nail set, and finishing nails. The main risk is a door that does not close properly due to a crooked frame, which is frustrating but fixable. This is a good project for homeowners who are comfortable with basic carpentry and want a fast visual upgrade.
Bathroom Fixture Swaps (Non-Plumbing)
Swapping a vanity top, faucet, showerhead, or toilet seat does not require moving pipes, and it transforms a bathroom for a fraction of a remodel cost. A plumber might charge $200 to $400 to install a faucet, while the fixture itself costs $80 to $200. The skills required are basic: turning off the water supply, using a basin wrench, and applying plumber's tape correctly.
Know your limits here. Replacing a faucet or showerhead is safe DIY territory. Moving a drain line, soldering copper pipe, or installing a new toilet flange crosses into professional plumbing work. If water does not flow where it should after your swap, stop and call a licensed plumber before water damage spreads.
Installing a Tile Backsplash
A kitchen backsplash is a contained, low-risk tile project that delivers a high visual return. Professional installation often costs $800 to $1,500 for a typical kitchen, while materials (tile, adhesive, grout, sealer) run $200 to $500. The skills required include measuring, cutting tile with a wet saw or snap cutter, applying thin-set, and grouting.
Rent a wet saw rather than buying one, and practice cuts on scrap tile first. The main risks are uneven tiles and grout haze, both of which are cosmetic and correctable. Avoid tiling a shower or floor as a first project, because waterproofing errors in wet areas cause hidden mold damage that costs far more than the savings.
Basic Landscaping and Yard Upgrades
Landscaping consistently ranks among the highest-return home improvements, and much of the work is labor rather than specialized skill. Mulching, planting, edging, and building a simple garden bed cost a fraction of a landscaper's quote. A professional might charge $1,500 to $3,000 for a basic bed refresh, while materials run $300 to $700.
Tools needed are simple: a shovel, rake, wheelbarrow, and gloves. The risks are minimal, though you should call 811 before digging to avoid buried utility lines. For hardscaping like retaining walls or paver patios, the labor is heavy and improper base preparation causes settling, so consider a pro if the project involves significant grade changes.
Installing a Smart Thermostat
Smart thermostats pay for themselves through energy savings, and installation is a 30-minute DIY job for most homeowners. An HVAC technician might charge $100 to $200 for installation, while the device costs $100 to $250. The skills required are basic: turning off the breaker, labeling wires, and following the manufacturer's wiring diagram.
The one hard stop: if your wiring does not match the diagram or you see a wire labeled for a heat pump or dual-fuel system you do not understand, stop and call an HVAC professional. A miswired thermostat can damage the compressor, turning a $150 savings into a $2,000 repair.
Where DIY Mistakes Cost More Than Hiring a Pro
Some projects look manageable on video tutorials but carry hidden liabilities that outweigh any labor savings. Electrical work beyond swapping a light fixture or outlet, plumbing that involves moving supply or drain lines, structural changes like removing a wall, roofing, and gas appliance work all fall into this category. In most jurisdictions, regulated work requires permits and licensed professionals, and unpermitted work can complicate a future home sale or void insurance coverage.
Water damage is the silent budget killer. A poorly soldered pipe or a shower waterproofing mistake may not show symptoms for months, by which time mold has spread and subflooring has rotted. The repair bill for water damage routinely runs $3,000 to $10,000, far exceeding the $500 to $1,500 you might save by doing the plumbing yourself.
Electrical mistakes carry fire risk, and insurers may deny claims for fires caused by unpermitted DIY electrical work. Structural mistakes can compromise the load-bearing capacity of your home. When a project touches these systems, the question is not whether you can save money, but whether you can afford the downside. For a realistic look at seasonal maintenance costs that pair well with DIY upgrades, the fall home maintenance checklist budget guide offers a practical starting point.
How to Know When to Stop and Call a Contractor
Even within a DIY-friendly project, there are moments when the smartest financial move is to stop and bring in a professional. The earlier you recognize these signals, the less you spend correcting course. A good rule: if a mistake would require opening a wall, redoing waterproofing, or pulling a permit after the fact, call a pro before you proceed.
Watch for these stop signals during any project:
- You discover water damage, mold, or pest infestation behind a surface you removed.
- Wiring, pipes, or structural elements do not match what the tutorial or plan assumed.
- You have made the same fix twice and the result still is not correct.
- The work requires a permit, or your homeowner's insurance excludes unpermitted work.
- You feel unsafe on a ladder, roof, or around gas or electrical panels.
When one of these signals appears, pause the project and get a professional assessment. Many contractors offer free estimates, which means the cost of finding out whether you need help is zero. That estimate also gives you a benchmark for deciding whether to finish the job yourself or hand it off. For larger projects where DIY savings are unclear, BuySellRemodel helps homeowners plan affordable improvements and connect with experienced local contractors, making it easier to compare options before committing.
Building a Realistic DIY Budget and Timeline
DIY savings evaporate when projects drag on for months or require tool purchases that rival contractor labor costs. Build a budget that includes materials, tool rentals, permits, and a 15 to 20 percent contingency for surprises. If the total still beats a professional quote by a meaningful margin (typically 30 percent or more), the project is worth doing yourself.
Timelines matter too. A weekend painting project that stretches into three weeks disrupts your home and often leads to rushed work. Estimate your hours honestly, multiply by 1.5, and schedule the project for a period when you can dedicate focused time. If the schedule does not work, hiring a pro may be the better value even if the raw numbers favor DIY.
Finally, document your work. Photos of the process, receipts for materials, and notes on what you did help with future maintenance and home resale. If you later sell, buyers and inspectors will want to know what was done and whether it was permitted.
Final Thoughts on DIY Savings
DIY home renovation projects that actually save money share common traits: high labor-to-material ratios, forgiving materials, low safety risk, and skills you can learn quickly. Painting, trim work, fixture swaps, backsplashes, landscaping, and smart thermostat installation all fit that profile. Projects involving electrical systems, plumbing lines, structural changes, and roofing do not, no matter how confident you feel after watching a tutorial.
The smartest approach is hybrid: do the cosmetic and labor-heavy work yourself, and hire licensed professionals for regulated systems and anything that carries water damage or safety risk. Get free estimates for the professional portions so you can compare costs and confirm your DIY plan actually pencils out. With honest self-assessment and a contingency budget, you can capture real savings without gambling with your home's value or your family's safety.