
How to Soundproof a Home Office During a Remodel
Cut noise through walls, doors, and floors with smart soundproofing during your remodel. Call (833)-439-3727 for free contractor estimates.

By Wendy Walsh
Learn more about Sound Proofing for guides, costs, and what to expect.
Compare Sound Proofing Pros Near You

Enter your ZIP code to compare top-rated local professionals and request free quotes.
You are finally getting that home office you have always wanted, but there is a catch: every conversation, television show, and slammed door from the rest of the house seems to find its way in. If you are already tearing down drywall or planning a renovation, you have a golden opportunity to soundproof your home office properly. The walls are open, the floors are accessible, and you can make noise-blocking upgrades that would be far more expensive and disruptive later. This guide will walk you through exactly how to soundproof a home office during a remodel, from affordable DIY fixes to high-end construction techniques, so you can create a quiet, productive workspace without blowing your budget.
Before you pick up a caulk gun or start researching resilient channels, it helps to understand how sound travels. There are two main types of noise you will be fighting: airborne sound (voices, music, TV) and impact noise (footsteps, furniture scraping). Airborne sound is best blocked with mass and airtight seals, while impact noise is reduced with decoupling and soft surfaces. During a remodel, you can address both at the source. The strategies below range from simple, low-cost steps you can do yourself to advanced framing techniques that require a contractor. We will help you decide which approach fits your budget, your DIY comfort level, and your timeline.
Start With the Gaps: Air Sealing and Weatherstripping
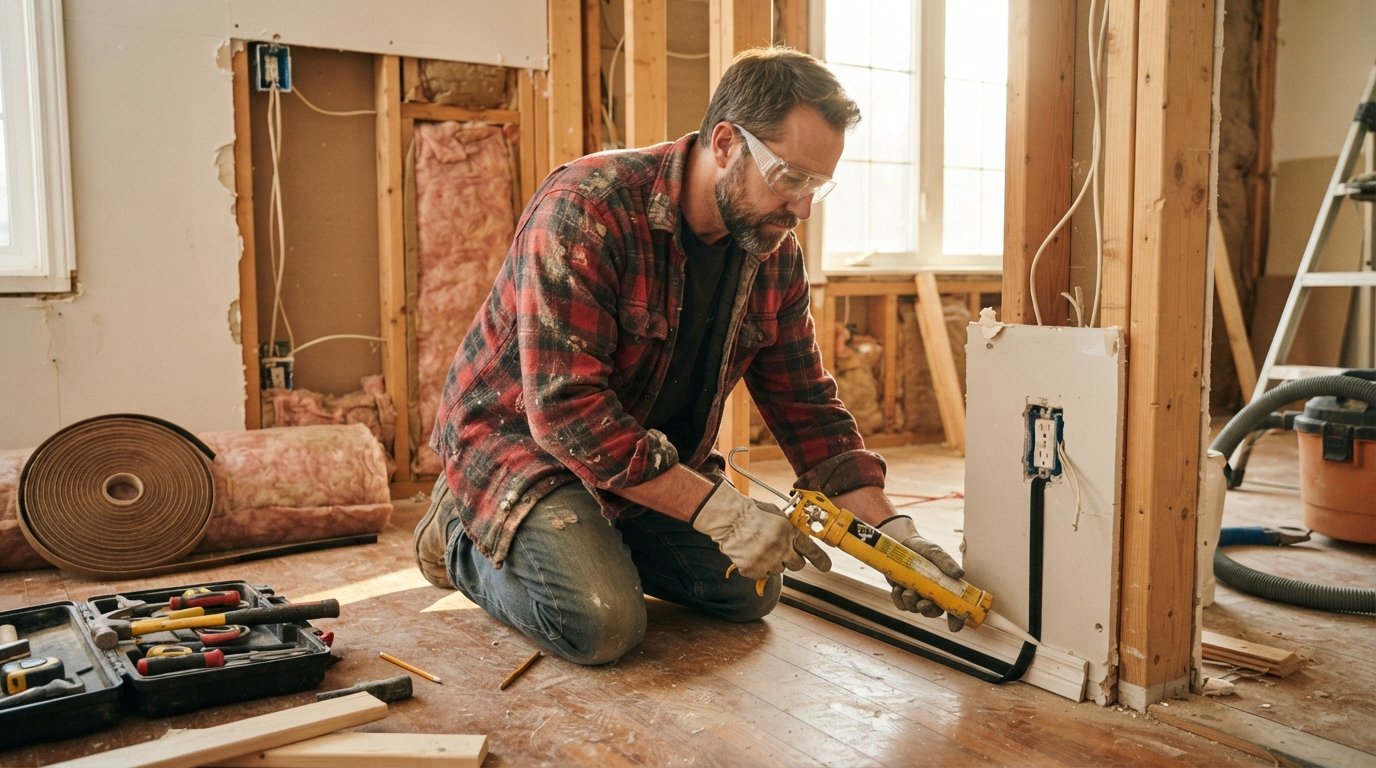
Before you invest in expensive materials, tackle the weakest links: gaps and cracks. Sound leaks through the smallest openings the same way air does. In fact, a single unsealed electrical outlet or a gap under the door can undermine an otherwise well-insulated wall. During a remodel, you have easy access to these problem areas, so make air sealing your first priority. Walk around the perimeter of the room and identify every penetration: outlets, switches, light fixtures, plumbing pipes, and ductwork. Even the joint where the drywall meets the floor can be a hidden culprit.
For a typical home office remodel, here is a simple sequence for sealing gaps:
- Remove outlet and switch plate covers. Apply acoustic caulk or foam gaskets around the electrical boxes, then reinstall the covers. Gaskets are cheap and effective.
- Seal any gaps around pipes, ducts, and cables where they pass through walls or floors. Use acoustic sealant, not standard caulk, because it remains flexible and blocks sound better.
- Check the perimeter of the room: apply a bead of acoustic caulk where the drywall meets the floor and ceiling. If you are installing new drywall, seal the bottom plate to the subfloor before hanging panels.
- For doors, install a door sweep or automatic door bottom to close the gap between the door and the floor. Add weatherstripping around the frame and a door seal kit to tighten the closure.
These steps are inexpensive and can be done by most homeowners with basic tools. They are especially important if you are remodeling on a tight budget, because they deliver a high return for a small investment. If you are not comfortable removing outlets or working around electrical components, hire a licensed electrician or handyman for the electrical portions. Safety first: always turn off power at the breaker before working near wiring.
Upgrade Doors and Windows: The Best Noise Reduction Per Dollar
In most homes, the door and windows are the weakest acoustic points in a room. A standard hollow-core door offers little resistance to sound, and single-pane windows leak noise through both the glass and the frame. If your remodel includes replacing these elements, you can achieve dramatic improvements without rebuilding walls. A solid-core or insulated door, combined with proper weatherstripping and a door sweep, can reduce noise transmission significantly. For windows, double-pane glass with laminated or dissimilar thickness panes performs much better than standard double-pane units.
Here is a comparison of door and window upgrades by budget level:
- Budget (under $200): Add a door seal kit and a door sweep to your existing door. Apply window film or heavy curtains as a temporary fix. These measures are not permanent but can take the edge off.
- Mid-range ($200 to $800): Replace a hollow-core door with a solid-core or insulated door. Add high-quality weatherstripping and an automatic door bottom. For windows, install secondary glazing or acoustic window inserts if replacement is not in the budget.
- High-end ($800 and up): Install a true acoustic door with a sealed frame, or replace windows with laminated glass units designed for sound reduction. These options offer the best performance but require professional installation.
If you are working with a contractor on your remodel, discuss door and window upgrades early. The rough openings may need adjustment, and ordering custom sizes takes time. Also consider the room layout: placing the desk away from the door and windows reduces perceived noise. If you are converting a spare room into an office, as covered in our guide on spare room to home office cost and design, door and window choices should be part of the initial plan. A quiet office is not just about walls; it is about controlling every opening.
Insulation, Resilient Channels, and Double Drywall Explained Simply
If you are opening up walls during your remodel, you have the chance to add mass and decoupling, the two most effective strategies for blocking airborne sound. Insulation is the easiest upgrade: adding batt insulation or blown-in insulation to the wall cavities absorbs sound and reduces resonance. For best results, use mineral wool or acoustic batts rather than standard fiberglass, as they are denser and better at blocking noise. This is a relatively low-cost step that any contractor can include while the walls are open.
Resilient channels and double drywall take things a step further. Resilient channels are metal strips that attach to the studs and hold the drywall, creating a small gap that decouples the drywall from the framing. This breaks the path for sound vibrations. Double drywall involves hanging two layers of drywall, often with a damping compound between them, to add mass. When combined, resilient channels plus double drywall can significantly reduce sound transmission, but they also add cost and complexity. Here is a simple comparison:
- Insulation only: Lowest cost, moderate improvement. Good for blocking mid-to-high frequency noise like voices.
- Double drywall: Moderate cost, good improvement. Adds mass without changing wall thickness much. Can be done by a skilled DIYer.
- Resilient channels plus double drywall: Highest cost, best performance. Requires careful installation to avoid short circuits that ruin the decoupling effect. Best left to a professional.
Keep in mind that these upgrades increase wall thickness, which can affect door jambs, electrical box depth, and trim. Plan for these details during the design phase. If you are working with a contractor, ask them to incorporate soundproofing into the framing and drywall schedule. It is much easier to do now than after the walls are painted. And if you are also planning other upgrades, such as electrical work, consider bundling tasks to save on labor costs. For homeowners looking for affordable remodeling help, BuySellRemodel offers resources and connections to local pros who can handle soundproofing and other renovation needs.
Fixing Shared Ductwork and Outlets That Leak Sound
Shared ductwork is a common and often overlooked path for sound transfer. If your home office shares HVAC ducts with a noisy room, voices and TV noise can travel through the ducts as if through a speaking tube. During a remodel, you can address this by installing duct liners, baffles, or flexible duct connectors that break the sound path. For a simpler fix, consider adding a return air vent with a sound trap, or sealing gaps around duct penetrations with acoustic sealant. If the ducts are accessible, wrapping them with mass-loaded vinyl or insulation can also help.
Electrical outlets are another weak point. Even after you seal the gaps, sound can pass through the boxes themselves. For a more thorough job, install acoustic putty pads around the back of electrical boxes. These are flexible pads that wrap around the box and block sound transmission. They are inexpensive and easy to install when the wall is open. Similarly, if you have recessed lights, use acoustic-rated covers or boxes to prevent sound from leaking into the ceiling cavity. These small details add up to a quieter room.
If your remodel includes adding new circuits or outlets, coordinate with your electrician to install putty pads and gaskets at the same time. This is far easier than retrofitting later. And if you are not comfortable working inside electrical boxes, hire a professional. The cost is minimal compared to the benefit of a quiet office.
Budget Versus High-End Soundproofing Approaches Compared
Soundproofing can range from a few dollars in caulk to thousands of dollars in construction upgrades. To help you decide, here is a side-by-side comparison of budget and high-end approaches, along with expected results. Keep in mind that perfect silence is rarely achievable in a residential setting, but you can dramatically reduce noise with the right combination of strategies.
- Budget approach (under $500): Focus on air sealing, door seals, outlet gaskets, and heavy curtains. This is ideal for DIYers and renters. It will reduce noise by perhaps 30 to 50 percent, depending on the starting point.
- Mid-range approach ($500 to $2,000): Add insulation to walls, upgrade to a solid-core door, install acoustic window inserts, and seal ductwork. This can be a mix of DIY and contractor work. Expect a 50 to 70 percent reduction in noise.
- High-end approach ($2,000 and up): Include resilient channels, double drywall, acoustic door and window replacement, and professional duct modifications. This is a full construction project and requires a contractor. It can achieve 70 to 90 percent noise reduction, depending on the quality of installation.
When planning your budget, prioritize the improvements that address the biggest noise sources. For example, if street noise is the problem, windows are the priority. If household voices are the issue, walls and doors matter most. A contractor can help you assess your specific situation and recommend the most cost-effective combination. Remember that soundproofing is cumulative: each layer helps, and the sum is greater than the parts.
DIY Versus Contractor: When to Bring in a Pro
Some soundproofing tasks are well within the reach of a handy homeowner. Caulking gaps, installing door sweeps, adding outlet gaskets, and hanging heavy curtains are all straightforward DIY projects. These tasks require basic tools and a little patience, and they can be done over a weekend. If you are remodeling on a tight budget, tackling these yourself frees up funds for materials or other parts of the project.
However, some tasks are best left to professionals. Installing resilient channels and double drywall requires precise work to avoid creating sound bridges that negate the decoupling. Electrical work around outlets and fixtures should be done by a licensed electrician. Duct modifications may require an HVAC specialist. And if you are replacing windows or doors, professional installation ensures proper sealing and performance. A good contractor can also advise on the best sequence for soundproofing during your remodel, so you do not waste time or money on ineffective measures.
If you are unsure where to start, consider getting a free estimate from a local contractor who specializes in remodeling and soundproofing. Many contractors offer free quotes, and comparing a few bids can help you understand the scope and cost. The team at HomeReModelingsContractors.com can connect you with experienced local pros who understand how to integrate soundproofing into a larger remodel. Whether you need a full wall rebuild or just a few targeted fixes, getting professional input early can save you from costly mistakes.
In the end, how to soundproof a home office during a remodel comes down to planning and prioritization. Start with the gaps, upgrade the weakest openings, and add mass and decoupling where your budget allows. Even small steps can make a big difference in creating a quiet, focused workspace. With the walls open and the right strategy, you can build an office that keeps the noise out and your productivity in.