
How to Create a Laundry Room That Works in a Small Space
A functional laundry room in a small space starts with smart layout choices. Call (833)-439-3727 to plan your upgrade with a local pro.

Learn more about Room Remodel for guides, costs, and what to expect.
Compare Room Remodel Pros Near You

Enter your ZIP code to compare top-rated local professionals and request free quotes.
A washer and dryer can turn a closet, a hallway nook, or a corner of the garage into a genuine asset, but only if you plan the space before you buy the appliances. Too many homeowners squeeze in full-size machines and then discover there is no room for a detergent bottle, no way to open the dryer door, and no access to the shutoff valves when a hose starts leaking. The good news is that a functional laundry area does not require square footage; it requires smart sequencing. You need to decide on the machine configuration first, protect the structure second, and add storage last. Get those three layers right, and even a 3-by-5-foot alcove can handle weekly laundry for a family of four without feeling like an obstacle course.
Start With the Machine Configuration, Not the Cabinets
The single biggest decision in a small laundry room is whether the washer and dryer sit side by side or stack vertically. This choice drives everything else: the electrical and plumbing rough-in, the door swing, the amount of counter space you can add, and how much clearance you need around each unit. Measure the room honestly, including door swing and the space needed to stand in front of the machines with a laundry basket. A common mistake is measuring wall to wall and forgetting that a side-by-side pair of full-size units needs roughly 5 to 6 feet of width, plus a few inches of breathing room so the machines do not vibrate against each other or the walls.
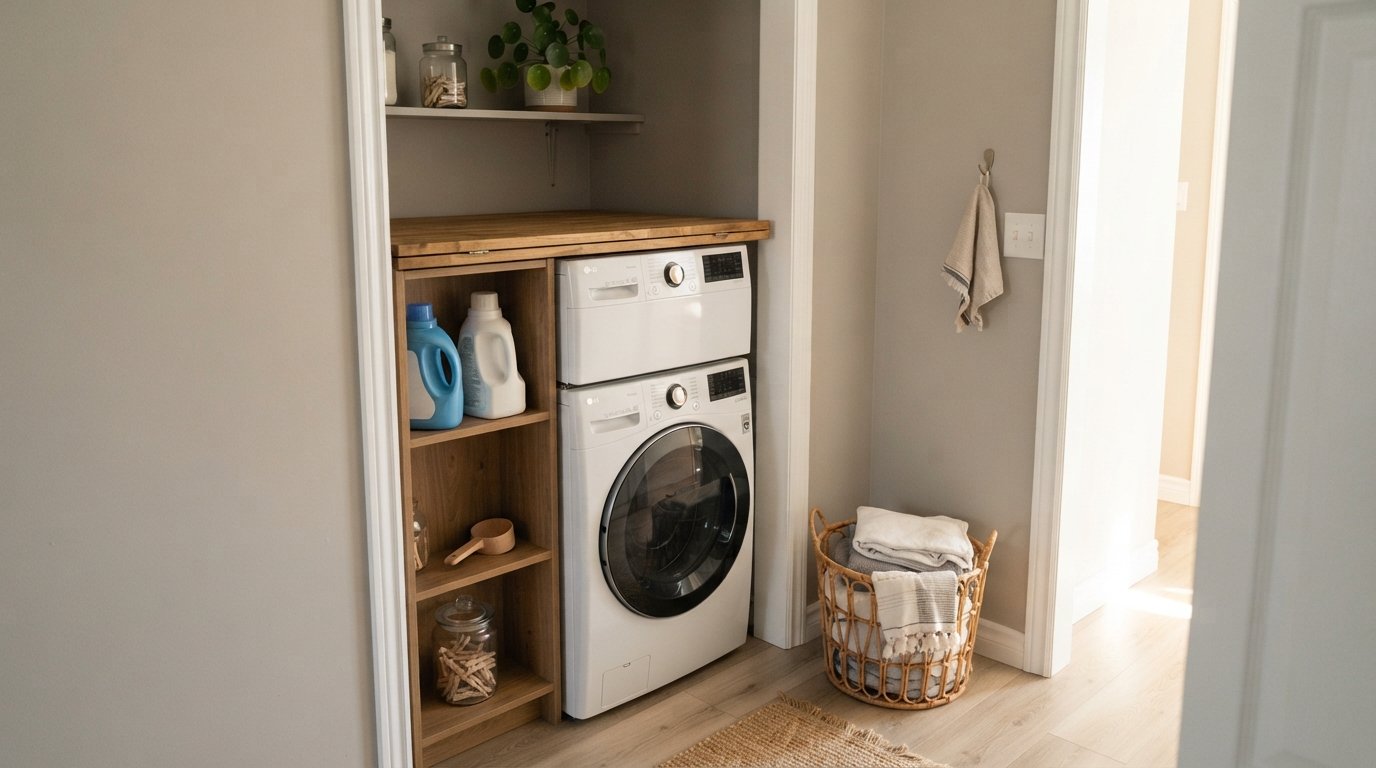
Stacked units, whether a front-load washer with a matching dryer on top or a combined washer-dryer unit, free up floor space and often allow you to tuck the laundry into a closet. The tradeoff is that you lose the convenient work surface on top of the machines unless you add a folding shelf beside them, and the dryer becomes harder to reach for shorter household members. Side-by-side units give you a continuous counter above both machines, which is the most useful feature in a small laundry room, but they consume more width. If your room is narrow but tall, stack. If it is wide but shallow, go side by side and add a counter.
Before you commit, check the door swing and the depth of each unit with the door open. A front-load washer needs clearance in front for loading, and a side-swing dryer door can block a walkway. Many small laundry rooms work best with a dryer whose door can be reversed, or with a ventless heat-pump dryer that eliminates the need for a duct run. If you are still weighing appliance types and budget, our guide on laundry room remodel cost and layout ideas for 2026 breaks down typical price ranges and placement options so you can compare configurations before you buy.
Protect the Room: Venting, Drain Pans, and Shutoff Access
Small laundry rooms concentrate risk. A slow hose leak that would be a minor annoyance in a big utility room can soak a hallway floor, warp nearby cabinetry, and damage the ceiling below. The essentials are not glamorous, but they are the difference between a laundry room that works and one that creates expensive surprises. Start with venting: a standard dryer needs a rigid or semi-rigid metal duct that runs as short and straight as possible to the exterior. Flexible foil or plastic ducts trap lint and are a fire hazard, and long, winding runs make the dryer work harder and dry slower. If your only viable location has no exterior wall nearby, a ventless heat-pump dryer is often the practical answer, though it costs more upfront and needs a drain or a condensate pump.
Next, install a drain pan under the washer if the laundry area sits above a finished space or on an upper floor. The pan should have a drain line that carries water to a safe location, not just a lip that holds water until you notice it. Pair the pan with braided stainless steel hoses instead of rubber, and replace hoses every five years. Most importantly, make sure you can reach the water shutoff valves without pulling the machine out. In a tight room, that may mean installing a single lever shutoff valve set slightly to the side of the machine or using an accessible panel. If the valves are buried behind the washer, you will not use them, and that is exactly when a hose fails.
Electrical access matters too. A dedicated 20-amp circuit for the laundry is standard, and the receptacle should be reachable without moving the appliances. If you are remodeling, this is the moment to add a leak detector or a shutoff system that stops the water supply automatically when it senses moisture. These devices are inexpensive compared to water damage repairs, and they are far easier to install before the cabinets and counter go in. Treat the plumbing and venting as the bones of the room: everything else is cosmetic by comparison.
Build Budget Storage That Earns Its Space
Storage in a small laundry room should be vertical and shallow. Deep cabinets look generous but swallow items and force you to dig, while shallow shelves keep detergent, stain removers, and dryer sheets visible and reachable. A good rule is to reserve the wall above the machines for a single shelf at about 12 inches deep, high enough to clear the controls, and then use the wall beside the machines for a tall, narrow pull-out or a stack of baskets. If you have a closet-style laundry, a door-mounted rack or an over-the-door organizer can hold irons, lint rollers, and spare hangers without eating floor space.
A folding station is the upgrade most homeowners underestimate. In a side-by-side layout, a countertop over both machines gives you a place to fold, sort, and pretreat stains, and it can double as a landing zone for baskets. In a stacked layout, a wall-mounted folding shelf that drops down when needed and folds flat against the wall preserves the aisle. For drying space, a retractable clothesline or a wall-mounted drying rack above the machines handles delicates and air-dry items without a dedicated drying cabinet. If you have vertical wall space, a ceiling-mounted drying rack that lowers on a pulley keeps wet clothes out of the walkway.
Here are the storage moves that deliver the most function per dollar in a tight laundry area:
- One shallow shelf above the machines for daily detergent and supplies, at a height that clears the controls and the open dryer door.
- A wall-mounted folding shelf or a counter over side-by-side units to create a real work surface without adding footprint.
- A retractable drying rack or ceiling pulley for delicates, swimsuits, and items that should not tumble dry.
- A narrow rolling cart or pull-out hamper that fits between the machines and the wall for sorting and transporting loads.
- Closed upper cabinets or a tall cabinet beside the machines for bulk items, keeping the open shelf clear for everyday use.
Notice that none of these require expanding the room. The goal is to use the vertical plane and the wall space you already have, and to keep the floor clear so you can move a basket in and out without sidestepping. If you are planning a larger renovation and want to compare the cost of custom cabinetry against off-the-shelf shelving, the same cost and layout guide linked above covers where the money typically goes in a laundry remodel, which helps you decide which upgrades are worth the spend.
Quiet the Room: Sound and Vibration Control
A laundry room that shares a wall with a bedroom, living room, or home office needs sound control, or the spin cycle will become a household irritant. Vibration is the main culprit. A washer that is not perfectly level will walk across the floor and transmit thumping into the framing. Start by setting the machines on a level, solid floor and adjusting the feet until the unit does not rock. Anti-vibration pads or a rubber mat under each machine absorb some of the energy, and they are cheap insurance in a room with a wood subfloor. If the floor is springy, adding blocking under the appliances during a remodel is far easier than fixing it later.
For the walls, standard fiberglass insulation in the stud bays behind and beside the machines reduces airborne noise, and a double layer of drywall or a resilient channel can cut vibration transfer further. If you are opening the wall for plumbing or electrical work, that is the moment to add insulation and seal gaps around pipes and ducts with acoustic sealant. A solid-core door rather than a hollow one also helps contain noise, and weatherstripping around the door frame closes the remaining gap. These measures are modest in cost during a remodel and nearly impossible to retrofit cheaply afterward.
Machine choice matters as well. Front-load washers generally vibrate less than top-loaders with agitators, and heat-pump dryers run quieter than conventional vented dryers, though they take longer to dry. If the laundry area is adjacent to a nursery or a home office, it is worth reading the decibel ratings and checking reviews for vibration complaints before you buy. A quiet machine in a well-insulated alcove is a better investment than a premium cabinet package in a room you dread using.
Upgrades Worth Making Before Cabinets and Counters Go In
The order of work in a small laundry room matters because the cheapest time to add infrastructure is before the finishes. Once cabinets and counters are installed, adding an outlet, a shutoff valve, or a vent connection means cutting into finished surfaces and paying for repairs. So plan the rough-in stage carefully. Confirm that the electrical circuit can handle the machines and any future additions such as an ironing station or a small freezer. Add a dedicated outlet near the folding counter for an iron or a phone charger, and consider a GFCI receptacle near the sink if you add one. If you are thinking about a utility sink, rough in the drain and supply lines now even if the sink comes later.
Lighting is another pre-cabinet upgrade. Laundry rooms are often dim, and task lighting over the folding counter and above the machines makes the room safer and more pleasant. A simple LED strip under the shelf or a pair of surface-mounted fixtures is enough. Add a moisture-resistant exhaust fan if the room is enclosed and has no window, especially if you hang clothes to dry, because trapped humidity damages paint and encourages mold. Finally, consider the floor. Sheet vinyl or luxury vinyl plank is water-resistant, easy to clean, and far more forgiving than hardwood in a room with hoses and detergent spills.
If you would rather hand the planning and rough-in to a professional, it helps to compare local contractors before you commit. Services like BuySellRemodel help homeowners plan affordable home improvement projects and connect with experienced local contractors, from free estimates to remodeling, repairs, and upgrades, so you can find the right pro and get the job done right. For a small laundry room, a good contractor can confirm venting routes, electrical capacity, and shutoff access in an hour, which is time and money well spent before you order appliances.
Put the Plan in Order and Keep the Room Working
The most reliable way to create a laundry room that works in a small space is to sequence the decisions: configuration first, protection second, storage third, and finishes last. Measure the room and the door swings, choose stacked or side-by-side based on the dimensions you actually have, and confirm the venting route and shutoff access before you buy anything. Then add the shallow shelf, the folding surface, and the drying rack that fit the layout you chose. Quiet the room with leveling, pads, and insulation while the walls are open, and make the small infrastructure upgrades (outlet, lighting, fan, floor) before the cabinets hide the access points. None of these steps requires a big budget, and together they turn a cramped afterthought into a room that handles laundry day without drama.
If you are ready to move from planning to building, start by getting free estimates from local contractors who work on laundry rooms and utility spaces. A few quotes will tell you whether your venting and electrical plan is realistic, and they give you a benchmark for the cost of each upgrade. With a clear layout, protected plumbing, and storage that uses the walls instead of the floor, a small laundry room can be one of the most efficient spaces in the house.