
How to Reduce Noise from Plumbing Pipes in Walls
Practical steps to silence banging and gurgling pipes during a remodel. Call (833)-439-3727 for expert help with how to reduce noise from plumbing pipes in walls.

By Sophie Shaw
Learn more about Plumbing Pipe Repair for guides, costs, and what to expect.
Compare Plumbing Pipe Repair Pros Near You

Enter your ZIP code to compare top-rated local professionals and request free quotes.
That sudden bang when the faucet shuts off, the rhythmic hammering behind the drywall, or the eerie gurgle long after the water stops: if you recognize these sounds, you are living with noisy plumbing pipes in walls. While a little noise is normal, persistent banging, hammering, or whooshing can point to water hammer, loose pipes, excessive pressure, or even a failing valve. The good news is that many fixes are straightforward, especially if you are already planning a remodel that will open up walls. This guide explains how to reduce noise from plumbing pipes in walls, from simple adjustments to permanent insulation and isolation strategies, so you can enjoy a quieter home and avoid bigger repair bills down the road.
Why Plumbing Pipes in Walls Make Noise
Understanding the source of the sound is the first step toward silencing it. Plumbing systems carry both supply water (pressurized) and drain water (gravity-fed), and each can create distinct noises. Supply lines often produce banging or hammering when valves close abruptly and the moving water has nowhere to go, a phenomenon called water hammer. Drain lines can gurgle or bubble when air gets trapped or when the pipe slope is incorrect. Meanwhile, loose pipes that are not secured to framing can rattle and vibrate against drywall, studs, or each other, amplifying every surge of water.
Temperature changes also play a role. As hot water flows through cold pipes, the metal expands and rubs against tight framing, creating ticking or creaking sounds. In older homes, pipes may have lost their original cushioning, or the straps may have loosened over decades. Before you start any soundproofing project, take a few minutes to listen and locate exactly where the noise originates. That will tell you whether you are dealing with a pressure issue, a loose pipe, or a drainage problem, and it will help you choose the right fix.
Diagnosing the Three Main Noises: Banging, Hammering, and Gurgling
Different sounds point to different root causes. Water hammer (the loud bang when a tap closes) is usually caused by high water pressure, a lack of air chambers, or worn-out valves. Hammering that happens repeatedly during water use often indicates loose pipes that are slamming against the wall cavity. Gurgling or bubbling in drains suggests a blocked vent, a partial clog, or improper venting that allows air to be pulled through the traps. In some cases, a high-pitched squeal or whoosh can come from a failing pressure-reducing valve or a toilet fill valve that needs replacement.
To narrow it down, try a simple test: turn off all faucets and listen. If the noise stops, it is likely supply-related. If you hear gurgling when a sink drains, the issue is on the drain side. You can also check your water pressure with an inexpensive gauge that screws onto a hose bib. Pressure above 80 psi is a common culprit for water hammer and noisy pipes. Once you know the type of noise and its likely cause, you can decide whether a DIY adjustment will suffice or whether it is time to call a licensed plumber.
When Noise Signals a Repair Issue vs. Normal Operation
Not all plumbing sounds are harmless. Occasional ticking as pipes heat up is normal, but loud banging, persistent hammering, or gurgling that happens every time you use a fixture can indicate a problem that will worsen over time. Water hammer, for example, can damage pipe joints, valves, and even appliances if left unaddressed. Gurgling drains may point to a clogged vent or a blocked drain that could eventually cause backups. A squealing noise from a valve often means the internal washer or cartridge is failing and could lead to a leak.
On the other hand, a gentle rush of water or a faint hum from a nearby pump is usually nothing to worry about. The key is consistency: if the noise is new, getting louder, or accompanied by reduced water flow, leaks, or slow drains, it is time to investigate. During a remodel, you have a unique opportunity to correct these issues while walls are open. A professional plumber can inspect the system, identify worn parts, and recommend fixes that will quiet the pipes and prevent future damage.
How to Reduce Noise from Plumbing Pipes in Walls During a Remodel
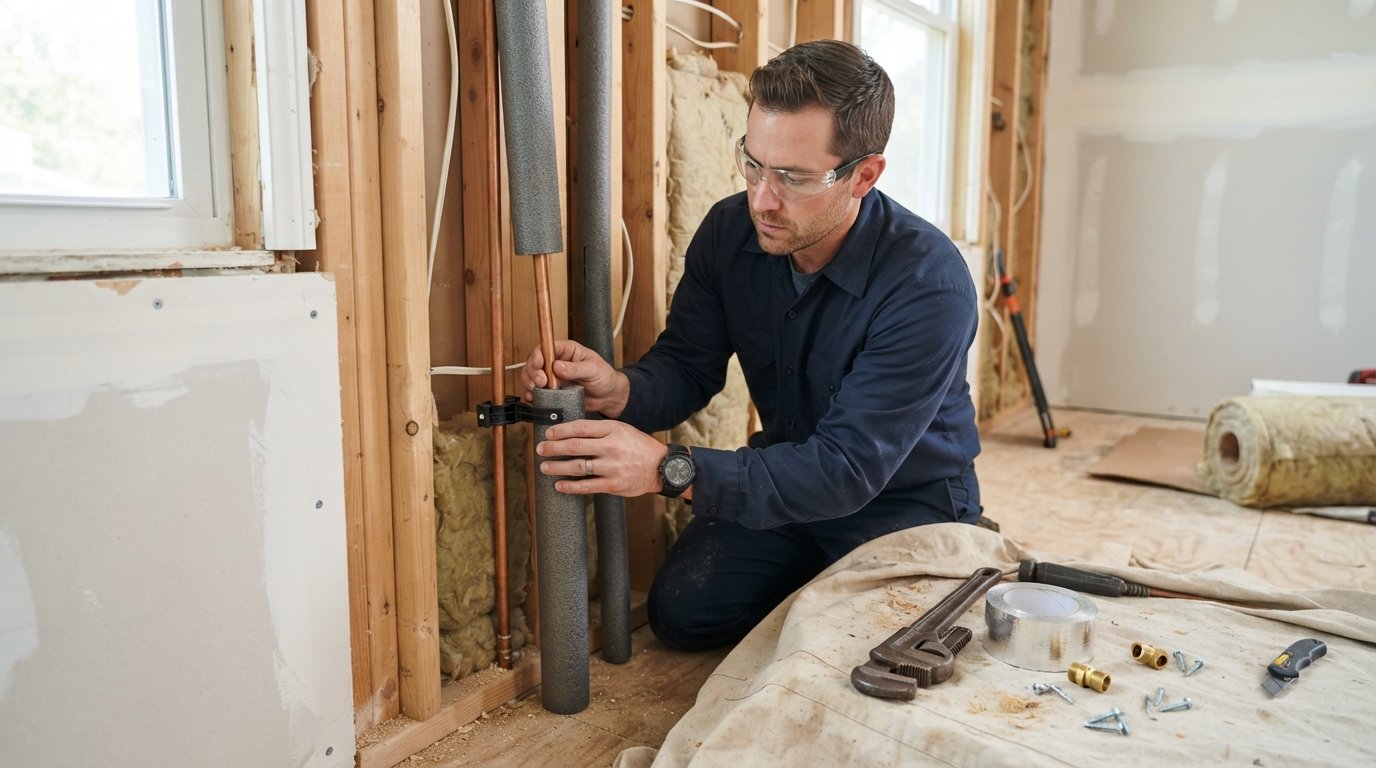
If you are planning a renovation that will expose wall cavities, you are in the best possible position to permanently silence your pipes. The most effective strategy is to combine insulation, isolation, and proper securing. Start by insulating both hot and cold supply lines with foam pipe insulation; this reduces the sound of water flow and also prevents condensation. For drain pipes, use a denser insulation wrap or acoustic insulation batts around the pipe. Next, isolate the pipes from the framing: use plastic pipe clips or isolators that create a cushion between the pipe and the stud, rather than metal straps that transmit vibration. Ensure that pipes are not touching drywall or each other, and add cushioning where they pass through holes.
If water hammer is the issue, consider installing water hammer arrestors at the ends of supply lines. These devices contain a trapped air pocket that absorbs the shock when valves close. They are inexpensive and easy to install when walls are open. For drains, make sure the pipe slope is correct and that vents are clear. Finally, when closing up the walls, use a sound-dampening drywall or add a layer of mass-loaded vinyl to further block noise transmission. These steps may add a small amount to your remodeling budget, but they deliver lasting quiet and can prevent costly repairs later. If you are coordinating multiple trades, it helps to work with a contractor who understands plumbing and can sequence the work properly. For homeowners looking to plan affordable improvements and connect with experienced local contractors, BuySellRemodel offers free estimates and a network of vetted professionals to help you get the job done right.
Practical Fixes for Noisy Pipes Without Opening Walls
If your walls are already closed, you can still tackle many noise problems. The first step is to check your water pressure and install a pressure-reducing valve (PRV) if it exceeds 80 psi. This single adjustment often eliminates water hammer and reduces overall pipe noise. For banging that occurs when appliances like the washing machine or dishwasher shut off, water hammer arrestors can be added at the fixture connections without opening walls. For exposed pipes in basements or utility rooms, simply insulating them with foam sleeves and securing them with cushioned clips can make a noticeable difference.
Gurgling drains can sometimes be resolved by clearing a blocked vent or adjusting the venting system, though this may require a plumber's expertise. If you hear noise from a specific fixture, such as a toilet or faucet, replacing worn washers or cartridges can stop squeals and whistles. In some cases, adding soundproofing to the room (such as acoustic caulk around pipe penetrations or installing a decorative box around exposed pipes) can help. However, if the noise is severe or widespread, it is worth consulting a professional to avoid masking a bigger issue.
Water Pressure Checks and Pressure-Reducing Valves
High water pressure is one of the most common causes of noisy pipes, and it is also hard on your plumbing system. To check your pressure, attach a gauge to an outdoor faucet or a laundry sink. If the reading is above 80 psi, you likely need a pressure-reducing valve. These valves are usually installed near the main water shutoff and can be adjusted to bring pressure down to a safe 50-60 psi. This not only quiets the pipes but also extends the life of your fixtures and appliances.
If you already have a PRV, it may be faulty or out of adjustment. A plumber can test and replace it if necessary. Keep in mind that some noise, like water hammer, can persist even at normal pressure if air chambers are waterlogged or missing. In that case, installing arrestors or replacing old air chambers is the solution. During a remodel, it is wise to have a plumber evaluate your entire water supply system and recommend a comprehensive noise-reduction plan.
Insulating and Isolating Pipes: Materials and Methods
When it comes to quieting pipes, the right materials make all the difference. For supply lines, closed-cell foam pipe insulation (available in various thicknesses) is affordable and easy to slip over pipes. It reduces the sound of flowing water and prevents sweating. For drain pipes, use a product specifically designed for sound dampening, such as acoustic pipe wrap or mass-loaded vinyl. These materials add mass to the pipe, blocking sound waves from radiating into the wall cavity.
Isolation is equally important. Metal straps and hangers transmit vibration directly to the framing. Replace them with plastic isolators or rubber-lined clamps that absorb vibration. Where pipes pass through studs or plates, use grommets or sealant to prevent contact. If you are opening walls, consider adding a layer of soundproofing insulation (like mineral wool) around the pipes before closing up. This combination of insulation and isolation is the most effective way to reduce noise from plumbing pipes in walls for the long term.
Coordinating Noise Fixes with a Plumbing Pro During a Remodel
While some noise fixes are DIY-friendly, major plumbing work is best left to a licensed professional, especially when walls are open and multiple trades are involved. A plumber can inspect your system, identify code issues, and install solutions like water hammer arrestors, pressure-reducing valves, and proper pipe supports. They can also ensure that drain slopes and venting are correct, which prevents gurgling and future clogs. When planning a remodel, bring in a plumber early to assess the existing plumbing and incorporate noise-reduction measures into the scope of work.
If you are hiring a general contractor, make sure they have a clear plan for plumbing noise reduction and that the plumber's work is sequenced properly with insulation and drywall. Ask for a written estimate that includes materials and labor for noise fixes. It is also a good idea to get multiple quotes to compare options and ensure you are getting a fair price. Homeowners who want to simplify the process can use services like HomeReModelingsContractors.com to request free estimates from local, experienced contractors. This allows you to compare bids and choose a professional who understands your goals for a quieter home.
Preventive Measures and Long-Term Quiet
Once you have addressed the immediate noise issues, take steps to prevent them from returning. Regularly check your water pressure and adjust the PRV if needed. Avoid slamming faucets and appliances; instead, close valves gently. If you are replacing fixtures, choose models with soft-close or pressure-balanced valves that reduce water hammer. During future renovations, always insulate and isolate any new pipes you install. And if you notice new noises, investigate promptly before they escalate.
For homeowners planning a remodel, addressing plumbing noise is a smart investment that improves comfort and protects your home's value. By combining professional inspections with DIY-friendly fixes, you can enjoy a peaceful environment and avoid costly emergency repairs. Whether you are opening walls for a major renovation or simply looking to quiet existing pipes, the strategies outlined here will help you achieve lasting quiet.