
How Long Does It Take to Finish a Basement?
Finishing a basement typically takes 2 to 6 months. Get a free estimate and a realistic timeline by calling 8334393727 today.

By Quinn Keller
Learn more about Basement Finishing or Remodeling for guides, costs, and what to expect.
Compare Basement Finishing or Remodeling Pros Near You

Enter your ZIP code to compare top-rated local professionals and request free quotes.
Finishing a basement is one of the smartest ways to add usable square footage to your home without the cost and disruption of a full addition. It can become a family room, a home office, a guest suite, or a rental unit that generates income. But before you commit, you need a realistic answer to one question: how long does it take to finish a basement? The honest answer is that most projects take anywhere from six weeks to six months, depending on scope, permits, and how quickly you make decisions. This guide breaks down the timeline phase by phase, explains what speeds things up or slows them down, and shows you how to plan so your project stays on track.
The Short Answer: Typical Basement Finishing Timelines
For a straightforward basement finishing project, you can expect a timeline of about two to four months from the day you sign a contract to the day you vacuum the new carpet. That range covers a basic layout with a main room, a bathroom rough-in, and standard finishes. If you are adding a full bathroom, a bedroom with an egress window, or a kitchenette, plan on the longer end, closer to four to six months.
Smaller projects move faster. A single-room finish, such as converting an unfinished corner into a home gym or office, might wrap up in four to six weeks if no plumbing or major electrical work is involved. On the other hand, a full basement apartment with a separate entrance, kitchen, and laundry can stretch to seven or eight months. The square footage matters less than the number of systems you touch. Plumbing, electrical, and HVAC work require inspections, and inspections require scheduling, which is where delays creep in.
It also helps to separate the project into two clocks: the construction clock and the decision clock. Construction might take ten weeks, but if you take three weeks to choose tile, the project takes thirteen. Homeowners who gather inspiration, set a budget, and pick finishes before breaking ground consistently finish faster. If you want a personalized estimate for your space, connecting with a local contractor early is the fastest way to get real numbers instead of guesses.
Phase-by-Phase Breakdown of a Basement Remodel
Understanding each phase helps you see where time goes and where you can compress the schedule. Most contractors follow a similar sequence, though the exact order can shift based on your design and local code requirements.
Phase 1: Planning, Design, and Permits (2 to 6 Weeks)
This phase starts before any hammer swings. You will define the layout, choose a design style, and set a budget. If you hire a designer or architect, add two to four weeks for drawings. Then comes the permit application. Depending on your municipality, permit review can take one to three weeks, and in busy jurisdictions it can take longer. Skipping permits to save time is a mistake: unpermitted work can derail a future home sale and force you to tear out finished walls.
During this phase, you should also line up your contractor and confirm the schedule. A good contractor will walk you through the plan, flag code issues, and give you a written timeline. This is also the time to order long-lead items like windows, custom cabinets, and specialty doors. Waiting until framing starts to order a custom vanity can add weeks to the project.
Phase 2: Demolition and Site Prep (3 to 7 Days)
If your basement is already finished and you are remodeling, demolition comes first. Crews remove old drywall, flooring, and fixtures. For an unfinished basement, this phase is minimal: clearing stored items, protecting the stairs, and setting up dust barriers. Either way, it is short but messy. Expect noise, dust, and a temporary staging area in your driveway or garage.
This is also when you address moisture issues. If the basement has ever leaked or smelled musty, fix the problem now. Waterproofing, a sump pump, or a dehumidifier installation adds a few days but protects everything that follows. Skipping this step is the single most common reason basements fail years later.
Phase 3: Framing and Structural Work (1 to 2 Weeks)
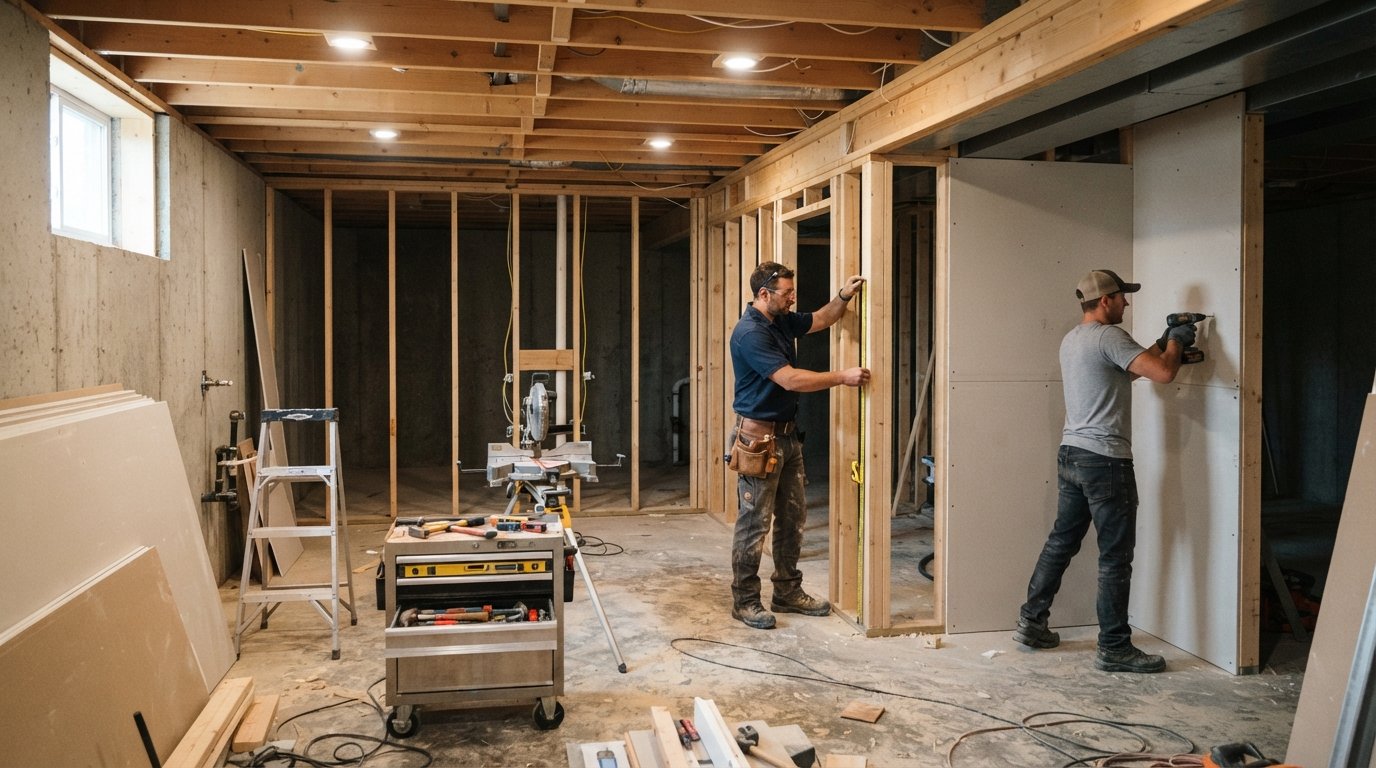
Framing creates the skeleton of your new space: walls, soffits around ducts, and openings for doors and windows. If you are adding an egress window or moving a load-bearing wall, structural work can add a week or more. Steel beams, engineered lumber, and foundation cuts require engineering approval and inspections, so build in buffer time.
Framing is also when you finalize the location of outlets, switches, and plumbing rough-ins. Walk the space with your contractor before the drywall goes up. Moving an outlet after drywall costs ten times more than moving it now.
Phase 4: Rough-In Plumbing, Electrical, and HVAC (1 to 3 Weeks)
This is the phase that most often causes delays, because it involves three trades and at least one inspection. A plumber runs drain lines and water supply for a bathroom or kitchenette. An electrician runs circuits, installs a subpanel if needed, and wires for lights, outlets, and smoke detectors. An HVAC technician extends ductwork or installs a mini-split system to keep the space comfortable.
Once the rough work is done, the inspector visits. If everything passes, you move to insulation and drywall. If something fails, you fix it and schedule a re-inspection, which can add several days. To keep things moving, hire licensed trades who know your local codes and can coordinate their schedules. A contractor who manages this sequencing for you is worth the fee.
Phase 5: Insulation, Drywall, and Finishes (3 to 6 Weeks)
Insulation and drywall transform the space visually. Drywall hanging, taping, and mudding take about a week for an average basement, plus drying time between coats. Then comes priming and painting, which adds a few days. After paint, the finish trades move in: flooring, trim, doors, cabinets, countertops, and fixtures.
Finish work is where your choices affect the schedule most. Standard carpet or luxury vinyl plank installs in a day or two. Tile work in a bathroom takes longer. Custom cabinetry can take a week or more to install and adjust. If you ordered materials late, this is where the delay shows up. Keep a punch list and walk the space daily so small issues get fixed before they snowball.
Phase 6: Final Inspection and Punch List (1 to 2 Weeks)
The final inspection confirms that all work meets code. Your contractor will also complete a punch list: touch-up paint, adjusting doors, sealing gaps, and testing outlets and fixtures. Once the inspector signs off and the punch list is done, you can move furniture in. Plan for a week of buffer here, because scheduling the final inspection and correcting small items rarely happens in a single day.
What Speeds Up or Slows Down a Basement Project
Two homeowners can start identical basements on the same day and finish months apart. The difference usually comes down to a handful of factors. Knowing them in advance lets you steer your project toward the fast lane.
- Permits and inspections: Simple layouts in lenient jurisdictions move quickly; complex plans with multiple inspections add weeks.
- Material lead times: Stock items ship in days, custom cabinets and windows can take six to twelve weeks.
- Decision speed: Every day you spend comparing paint swatches is a day your crew is idle or working elsewhere.
- Change orders: Mid-project changes reset schedules, add cost, and frustrate trades.
- Moisture and structural surprises: Hidden water damage, mold, or foundation cracks can add weeks of remediation.
Weather matters less for basements than for additions, but it still plays a role. Heavy rain can delay concrete work or exterior egress window installation. Winter can slow material deliveries. If you have flexibility, schedule the messy phases for milder months.
Another factor is the number of trades involved. A simple rec room with no plumbing needs framing, electrical, drywall, paint, and flooring: five trades. Add a bathroom and you add plumbing, tile, and fixtures. Add a kitchenette and you add cabinetry, countertops, and appliance installation. Each trade adds a scheduling handoff, and each handoff is a chance for delay. Fewer moving parts means a faster finish.
DIY vs. Hiring a Contractor: How It Affects Your Timeline
Doing the work yourself can save money, but it almost always takes longer. A professional crew works full days, has tools and material sources ready, and knows the inspection sequence. A DIY homeowner works evenings and weekends, learns as they go, and often redoes steps that fail inspection. A project that takes a pro ten weeks can take a DIYer six months or more.
That does not mean DIY is always wrong. If you are finishing a small office with no plumbing and you are comfortable with framing and electrical basics, you can save thousands. But for full basements with bathrooms, bedrooms, and code-heavy electrical work, hiring licensed pros is usually faster and safer. It also protects your home's value: buyers and inspectors trust permitted, professionally completed work.
If you want the best of both worlds, act as your own general contractor and hire licensed subs for each trade. You control the budget, but you also own the schedule. If coordinating trades sounds overwhelming, a general contractor earns their markup by keeping the timeline tight. For help comparing bids and finding vetted local pros, BuySellRemodel connects homeowners with experienced contractors who provide free estimates and clear timelines.
How to Keep Your Basement Project on Schedule
The best way to finish on time is to plan like a project manager. Start with a written schedule that lists each phase, the responsible trade, and the inspection points. Share it with everyone involved and review it weekly. When one task slips, adjust the next tasks immediately instead of hoping the schedule catches up on its own.
Make all finish selections before construction starts. Create a selection sheet with paint colors, flooring, tile, fixtures, and hardware, and order everything as early as possible. Store materials in a dry, secure area so they are ready when the crew needs them. If an item is backordered, choose an alternate immediately rather than waiting.
Keep communication tight. A daily or every-other-day check-in with your contractor catches small problems before they become expensive ones. Ask about the next three tasks and confirm that materials and inspections are lined up. If you are living in the home during the remodel, set clear expectations about work hours, dust control, and access to the basement.
Finally, hold a contingency fund and a time buffer. A ten to fifteen percent budget cushion and a two-week schedule buffer absorb most surprises without derailing the project. Basements are notorious for hidden issues, from moisture to outdated wiring, so plan for the unexpected. Homeowners who build in buffer time are far less stressed when a surprise appears.
Finishing a basement is a big project, but it is one of the most rewarding. You gain living space, storage, and often property value, all without changing your home's footprint. The timeline depends on your scope, your decisions, and your team. Start with a clear plan, hire licensed professionals, choose finishes early, and keep a buffer in both time and budget. If you want to hide imperfections in your finished space, our guide on paint color and finish choices offers practical tips that work especially well in basement lighting. With the right preparation, your basement can go from bare concrete to your favorite room in the house in a matter of months, not years.